Printing mistakes are expensive, but printing mistakes are preventable as well. And one of the most critical aspects of ensuring a successful print job is the creation of accurate dielines. Accurate dielines minimize errors during production, saving time, material, and money.
In this guide, we’ll walk you through everything you need to know about dielines. Learn to use design software effectively, avoid common mistakes, and produce professional-quality dielines that guarantee accurate cuts and folds.
What is a Dieline? A Quick Overview
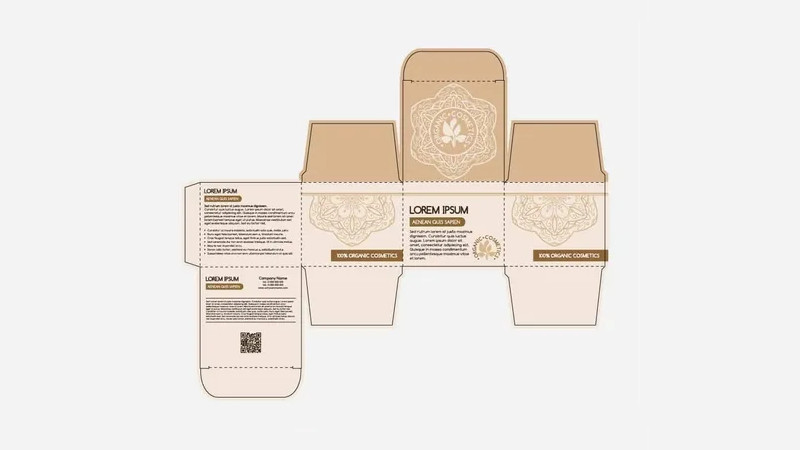
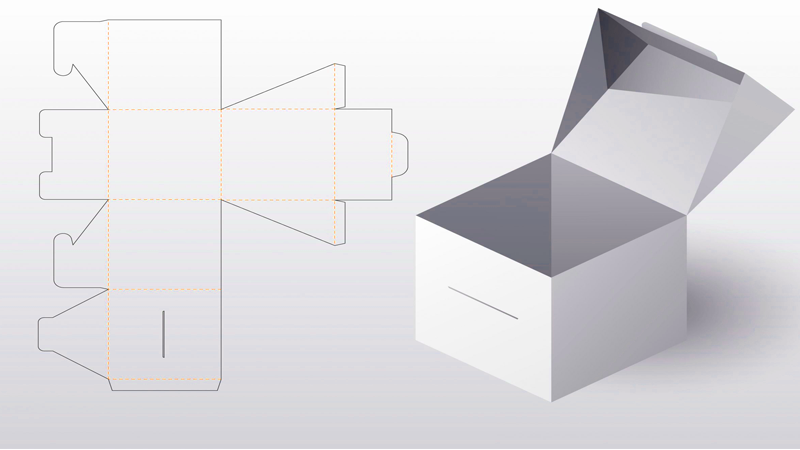
A dieline is a technical drawing or template that outlines the precise dimensions and shape of a printed piece before it’s cut and folded. Think of it as a blueprint for the final product. It shows where creases, cuts, and perforations should be located, ensuring accurate finishing. Here are the key elements of a dieline:
- Cut lines
- Fold lines
- Bleed lines
- Safety lines
*We will discuss each of these key elements in detail in the next sections.
Dielines are created using design software and are essential for communicating the exact specifications and printing method to printers, guaranteeing consistent and accurate results. Whether for packaging or marketing materials, dielines are crucial for achieving precision and professionalism.
The Importance of Packaging Dielines
As discussed earlier, accurate box dielines are essential for successful packaging design and printing. They ensure the final product meets the designer’s vision with precise folds, cuts, and alignments, and work seamlessly with the chosen printing method. Dielines also maintain packaging consistency, keeping artwork and logos perfectly positioned.
Plus, properly prepared dielines streamline production, enabling faster turnaround and better quality control. In addition to enhancing production efficiency, dielines also play a significant role in cost management. When dielines are accurate, it reduces the chances of reprints or errors during the paperboard packaging production process, ultimately saving both time and money.
Manufacturers can optimize marketing material usage, minimizing waste and reducing overall costs. This is particularly important for large-scale production runs, where even small inefficiencies can add up quickly.
Tools and Software for Creating Packaging Dielines
Accurate dielines are essential for cutting, folding, and scoring in packaging design, whether for product cartons or mailer boxes. The right tools and software enable precise dieline creation, ensuring seamless integration into production. Here are some of the most popular options:
- Adobe Illustrator: This industry-standard software is widely used for its powerful vector editing capabilities. It allows designers to create scalable dielines for structural design while keeping them separate from the artwork using enhanced layer management.
- CorelDRAW: Known for its dynamic guides and advanced layout tools, CorelDRAW makes aligning dieline components simple. Dielines for mailer boxes are typically created in this software, and its compatibility with various file formats ensures smooth workflows for the cutting and printing process.
- Die Cutting Software: Tools like Kongsberg and Roland CutStudio transform dielines into CNC cutting instructions. These solutions are ideal for precise folding and cutting processes, ensuring that mailer boxes are produced accurately every time.
- Procreate: While not primarily for dielines, Procreate is excellent for creating quick packaging mock-ups and concept art before finalizing designs.
- Blender: This open-source 3D modeling software allows designers to simulate packaging designs with animation and rendering features. It’s perfect for creating interactive visualizations.
- Inkscape: A free, open-source vector-based software alternative to premium programs, Inkscape offers powerful vector editing capabilities and supports popular formats like SVG and PDF, making it a budget-friendly option for dieline creation.
These tools cater to different stages of packaging design and box design, from concept development to production-ready dielines.
Step-by-Step Process to Create a Dieline Design for Printing
Creating accurate dielines might seem complicated, but following a clear step-by-step guide will help you create dielines that are both functional and visually appealing. Here is the breakdown of the creation process into manageable steps.
Step 1: Choose the Right Design Software
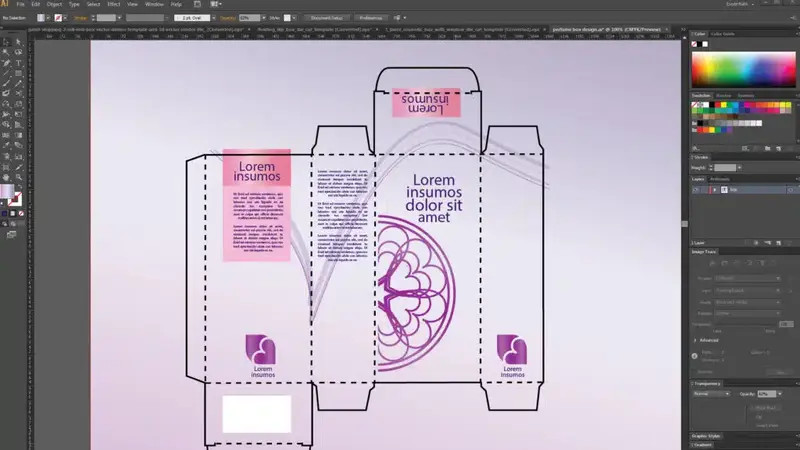
The first step in creating dielines is to choose the right graphic design tool. Adobe Illustrator is one of the most popular choices, as it allows you to create vector-based designs that are scalable and precise.
Vector files are a must for dielines because they offer:
- Perfect precision: They never blur, ensuring accurate measurements.
- Machine-friendly edges: The clean, sharp lines tell the die-cutting machine exactly where to cut and fold.”
Tip: Make sure you set the file in CMYK color mode, as this is the industry standard for print.
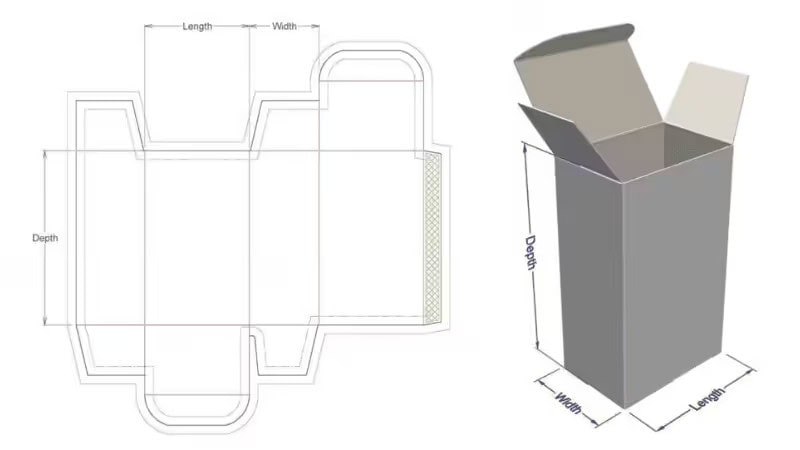
Step 2: Define Your Paper Size and Dimensions
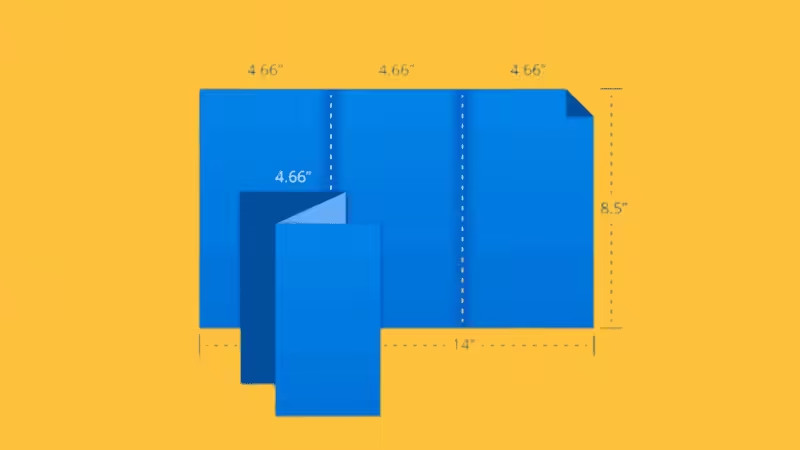
Once you’ve selected your graphic design applications, the next step is to set up your document with the correct paper size and customizable dimensions. If you’re creating packaging for a custom box or gift box, you’ll need to define the exact size of the box.
Using the dimensions of the product or artwork, adjust the document size to match the exact measurements for your final package, helping to reduce waste during production.
Tip: Always add a typical bleed of 3mm (1/8 inch) to prevent any unwanted white edges after cutting
Step 3: Draw the Dielines
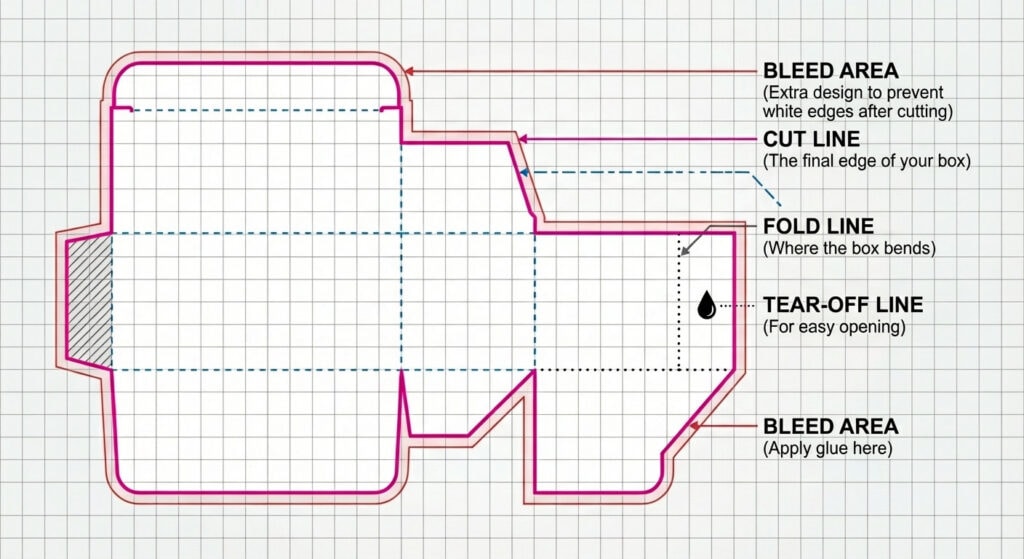
Now that the document is set up, you’ll need to draw the dielines for your design. These lines are essential steps that guide the die-cutters during production. Here are the most important lines to include:
- Cut Lines: These lines define the outer shape of the packaging. They indicate where the material will be cut. Be sure to use a spot color like 100% magenta or a custom color to distinguish these lines from the rest of the design.
- Fold Lines: Fold lines show where the material needs to be folded to create the final custom packaging. A dashed or thin line should represent these lines. Make sure they align perfectly with the cut lines to ensure smooth folds.
- Glue Tabs: If your custom boxes require glue for assembly, add glue tab marks where the edges will connect. This ensures that the box will be glued together correctly and securely.
- Perforation Lines: For packaging that needs to be torn open, perforation lines will be necessary. These should be clearly marked, often with a dashed line or a different color to stand out from the cut lines.
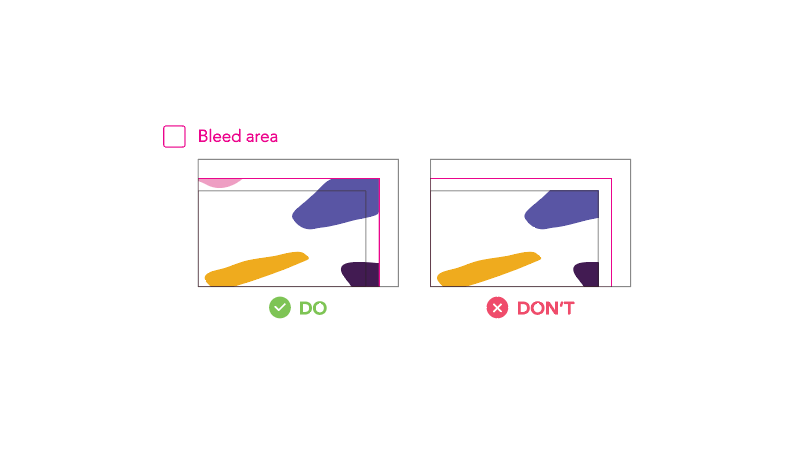
- Bleed Lines: Bleed lines are an extension of the design beyond the cut lines, ensuring that no unprinted area is left at the edges after the box is cut by including proper bleed areas and maintaining safety margins.
Tip: It’s important to note that these lines should be placed correctly according to your design.
Step 4: Include Safety Lines
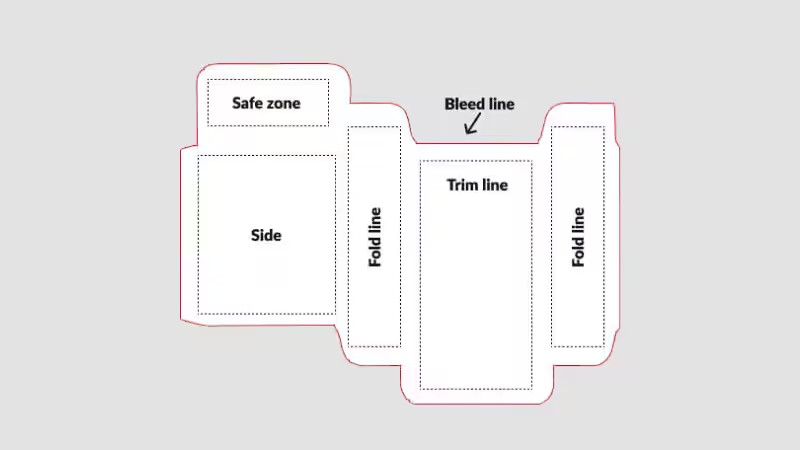
When creating dielines, it’s essential to add safety lines. These lines are a safe zone that keeps your text, logos, or any other critical design elements from being too close to the cut lines or fold lines. This safety margin ensures that no important parts of your design get trimmed off or lost in the folds of the final packaging.
Tip: Keep a minimum distance of 5mm from the cut lines to the text or design elements to ensure they stay within the safe zone.
Step 5: Add Additional Details
After defining basic elements like cut and fold lines, consider additional details for functionality. If your packaging design includes slots, tabs, or assembly points, mark these clearly on the dieline template to ensure accurate printing.
Use symbols like small circles or crosses to indicate where pieces interlock or need adhesive, ensuring important elements seamless assembly.
For complex designs, mathematically described lines may be required to achieve precision. These lines rely on exact measurements generated using a design tool or manual calculations.
Incorporating these ensures your dieline remains accurate, even for intricate shapes or advanced packaging needs, helping avoid costly production errors.
Tip: When adding assembly marks or slot indicators, use a consistent symbol set and size (e.g., 2–3mm circles for tabs) throughout the dieline. This consistency makes it easier for printers and assembly teams to understand and follow your design accurately.
Step 6: Review and Test the Dieline
Before sending the dielines to production, it’s critical to review and test them. A quality control process at this stage ensures that your dielines are aligned, correctly scaled, and fully functional. Use Adobe Illustrator or another program to create a test print of your dieline template to ensure everything lines up correctly.
Once you’re confident in the layout, share the dieline with your production team to get their input. They may have specific requirements, such as cut lines that need to be adjusted or fold lines that need to be more defined.
Tip: Always ensure that the final packaging can be easily folded and assembled by doing a physical mock-up or test run.
Step 7: Export the Dieline for Production
Once the dielines have been reviewed and tested, it’s time to export them for production. The file should be in a vector format, such as PDF or AI, and should include all the necessary cut lines, fold lines, perforation lines, and any other markings that the die cutters will need.
When you’re ready, send the dieline template to the production team, along with any specifications for the materials and other elements of the packaging. They will use the dielines to guide the die-cutting machines during the die-cutting process, ensuring the final product is made to your exact specifications.
Die Cutting Process
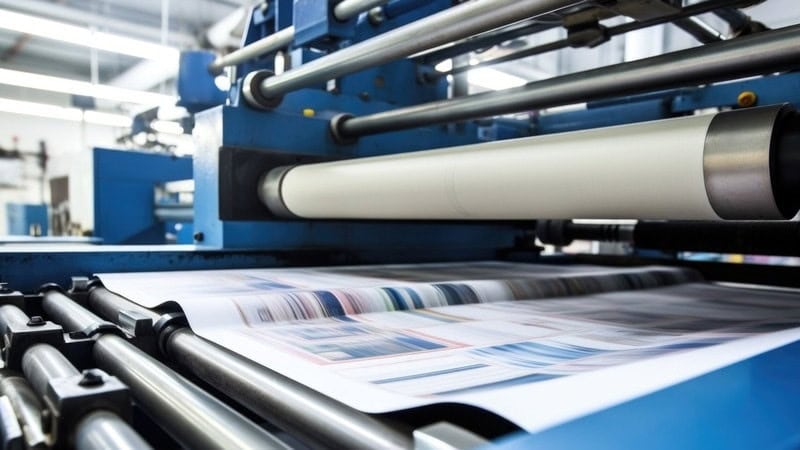
Creating a dieline is the crucial first step in the die-creation process, serving as the blueprint for precision cutting. However, the next phase—die cutting—is equally vital to the success of your packaging project. Die cutting is a specialized technique that uses a sharp-edged tool, or die, to cut materials into precise shapes.
This method allows manufacturers to produce custom boxes and packaging elements tailored to your exact design specifications. The result is packaging that not only looks visually appealing but also functions effectively to protect and present your product.
The accuracy of the die-cutting process is directly influenced by the quality of the dieline. Poorly defined or inaccurate dielines can lead to misaligned or improperly cut packaging, diminishing the overall aesthetic and practical value of the product.
Clean edges, well-placed folds, and accurate dimensions all stem from the precision of the dieline, emphasizing the importance of getting this foundational step right.
When die-cutting and die-lining work seamlessly together, the outcome is packaging that elevates your product, leaving a lasting impression on customers.
Common Mistakes in Dieline Creation

Designers often encounter challenges when creating dielines. Key mistakes include:
- Misalignment of cut and fold lines
- Can result in poorly executed cuts or uneven folds, making the final packaging look unprofessional or function incorrectly.
- Inadequate bleed lines
- Insufficient bleed may cause graphics to appear cropped or leave unwanted white spaces around edges, disrupting the intended design.
- Omitting essential safety lines
- Without safety lines, critical elements like text or logos risk being cut off during production, harming branding and usability.
- Unclear marking of dieline components
- All elements, such as scoring, perforations, and cut lines, must be clearly marked and correspond to specific packaging requirements.
Tip: By paying close attention to these pitfalls and double-checking the dieline before submission, designers can avoid costly revisions and ensure the final product meets both aesthetic and functional standards.
Best Practices for Working with Dielines
To avoid the issues mentioned earlier, it is essential to follow best practices for dielines to speed up the design and manufacturing process while ensuring better accuracy. Implementing these key tips will improve your dieline workflow and lead to a more efficient production process.
There are three crucial steps to follow:
1. Establish open communication
Communication is crucial between:
- Designers
- Clients
- Production teams
It’s important to discuss design goals, materials, and any special features, such as embossing or metal stamping, early on in the process. This helps avoid errors during production and ensures that everyone is on the same page from the start.
2. Use vector-based software
Essential tools for creating precise dielines include:
- Adobe Illustrator
- CorelDRAW
- Inkscape
Unlike raster-based programs, vector software allows for scalable lines without losing clarity, which is critical when it comes to die-cutting. This ensures accuracy throughout the design process, regardless of the size of the final product. It’s also vital to leave proper bleed and safety space in your dielines.
Safety zones are equally important to protect logos, text, and other vital design elements from being cut off during production.
3. Highlight line connections
It is important to clarify cut, fold, and score lines. Differentiating these lines using varied styles or colors will help die-cutters follow the correct instructions.
For instance, solid lines can indicate cuts, while dashed lines can represent folds, making it easier for the production team to execute the design as intended. By following these best practices, designers can create dielines that streamline the production process, reduce errors, and ensure high-quality results.
Dieline Examples and Templates
Dieline templates are crucial for accurately cutting, folding, and assembling packaging. Different types of packaging, such as boxes, bags, and labels, require specific dielines for precision. Where to Find Templates: The Dieline, Packlane, Template.net, Freepik, Creative Market, and more.
Now, here are some common dieline templates:
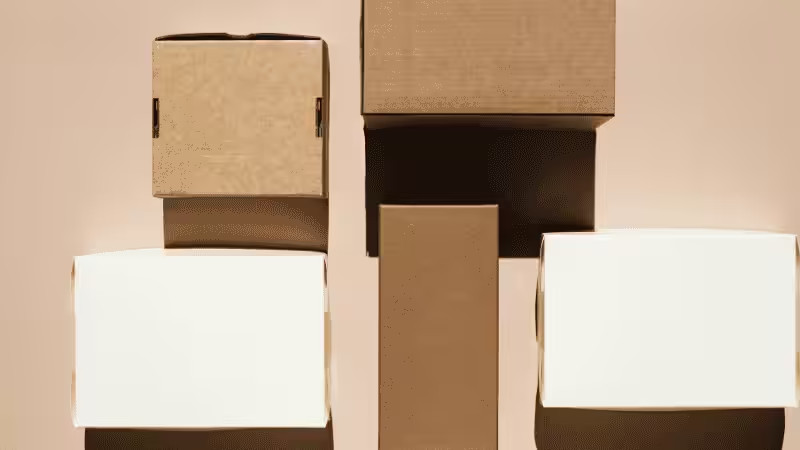
Box Templates
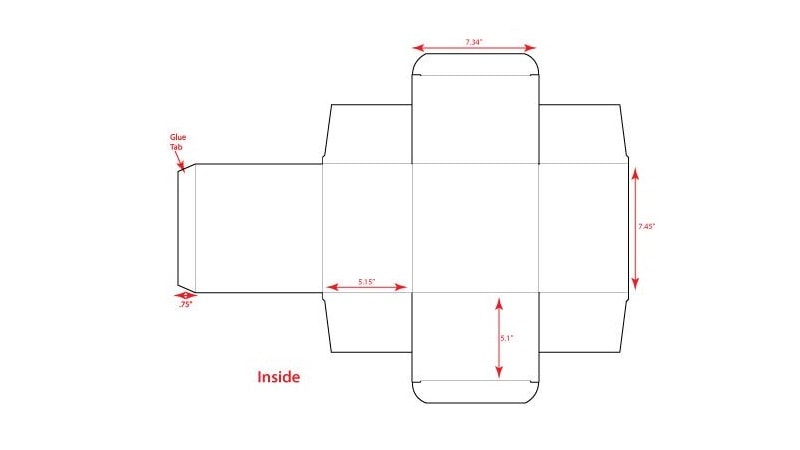
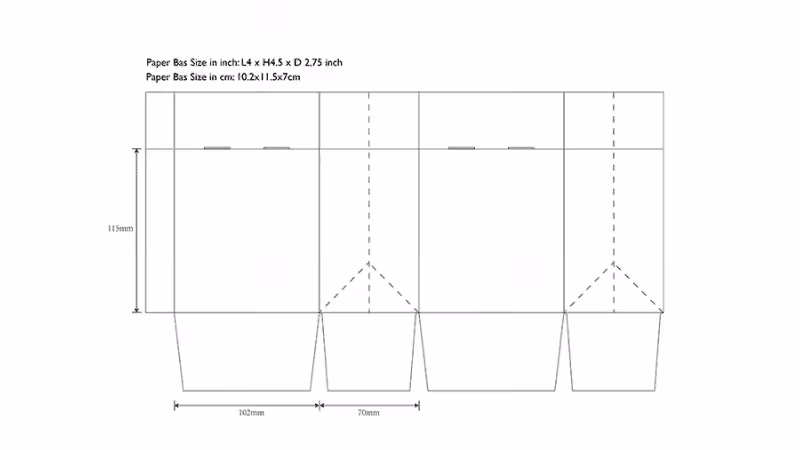
For boxes, the choice of dieline depends on the packaging style and purpose. Tuck-end boxes and folding cartons, commonly used for retail products, rely on dielines that incorporate structural cuts and tabs to facilitate easy assembly.
Rigid boxes, typically associated with premium packaging, demand more intricate dielines to accommodate their sturdy and elegant construction.
Similarly, corrugated boxes, known for their strength and reliability in shipping, require dielines featuring flaps, scores, and perforations that allow for secure closure and support during transit. With these options, you can ensure your box packaging is both functional and visually appealing.
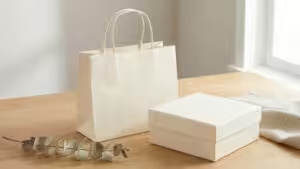
Bag Templates
Bag templates also vary depending on the style and intended use of the bag. Stand-up pouches, popular for food and beverage items, require dielines that include gussets and zippers to ensure proper stability and usability.
Kraft and luxury paper bags need dielines that account for folds, handles, and the thickness of the material, creating durable and sophisticated packaging solutions. F
or simpler designs, flat bags made of paper or plastic benefit from basic dielines that ensure precise cutting and efficient assembly. By tailoring the dieline to the specific bag design, you can achieve a perfect balance between practicality and aesthetics.
Label Templates
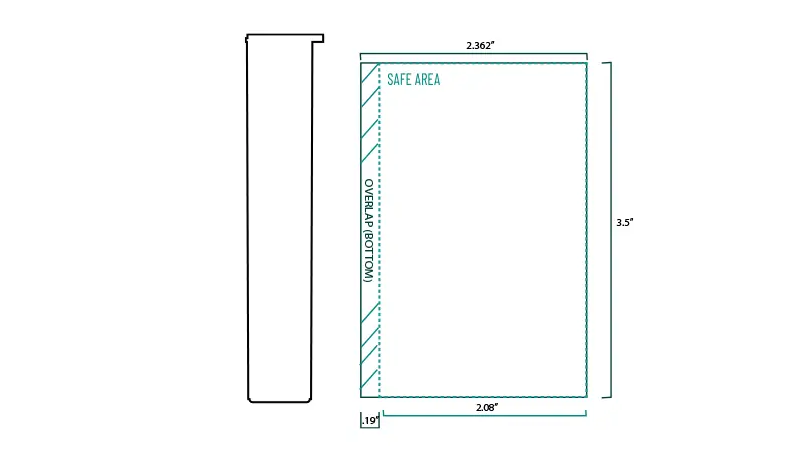
Labels play a crucial role in branding and packaging, and their dielines are designed to fit seamlessly on the product surface. Round or oval labels, commonly used on bottles and jars, require highly accurate dielines to prevent misalignment and ensure a clean application.
Square or rectangular labels need dielines tailored to exact measurements, offering a polished finish on flat or slightly curved surfaces.
For brands seeking a unique touch, custom-shaped labels, such as those in the form of animals, plants, or abstract shapes, are crafted with specialized dielines to achieve precision and enhance visual appeal. With the right label template, you can ensure your branding stands out effectively.
Conclusion
In conclusion, preparing accurate dielines is a crucial step in the printing and packaging process. That’s why it’s essential to pay close attention to every aspect of dieline creation, from dimensions and folds to cut lines and bleeds.
Remember, a well-prepared dieline is the foundation of successful packaging that not only protects your product but also enhances its visual appeal.
Get Accurate Dielines For Your Packaging With Packoi Now!
At Packoi, our company specializes in providing top-quality custom packaging solutions, including creating precise dielines for all types of custom boxes and packaging. Get a quote for your custom packaging today, and let Packoi help bring your design vision to life with precision and efficiency.